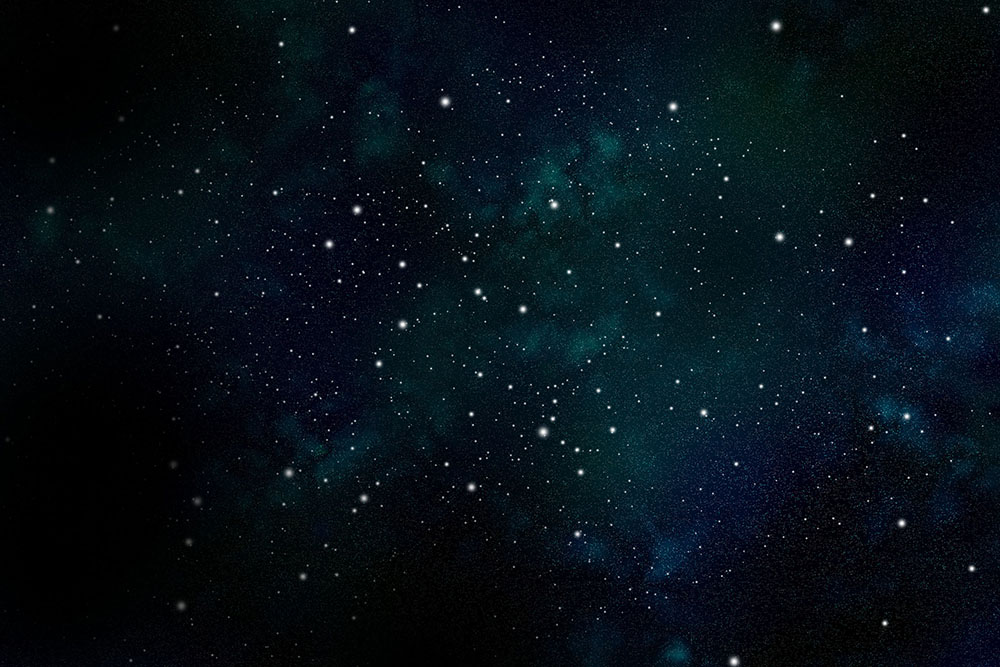
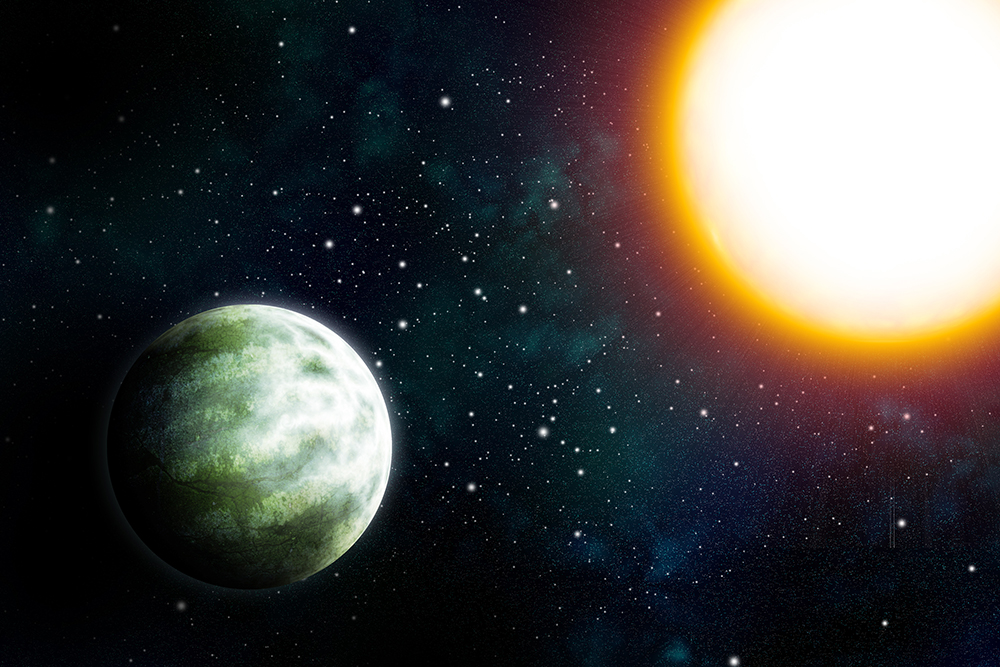
Photoshop Space Tutorial

Step 1. Make a new Photoshop document with the following dimensions:
height: 2000 px
width: 3000px
resolution: 300 dpi
Color Mode: RGB (Image > Mode > RGB)
Step 2.Your "Background" layer will probably be white. Double-click it and press Command + I to invert the color.
make a new layer and fill it with white
set the blending mode to "Dissolve", and the Opacity to "1%"
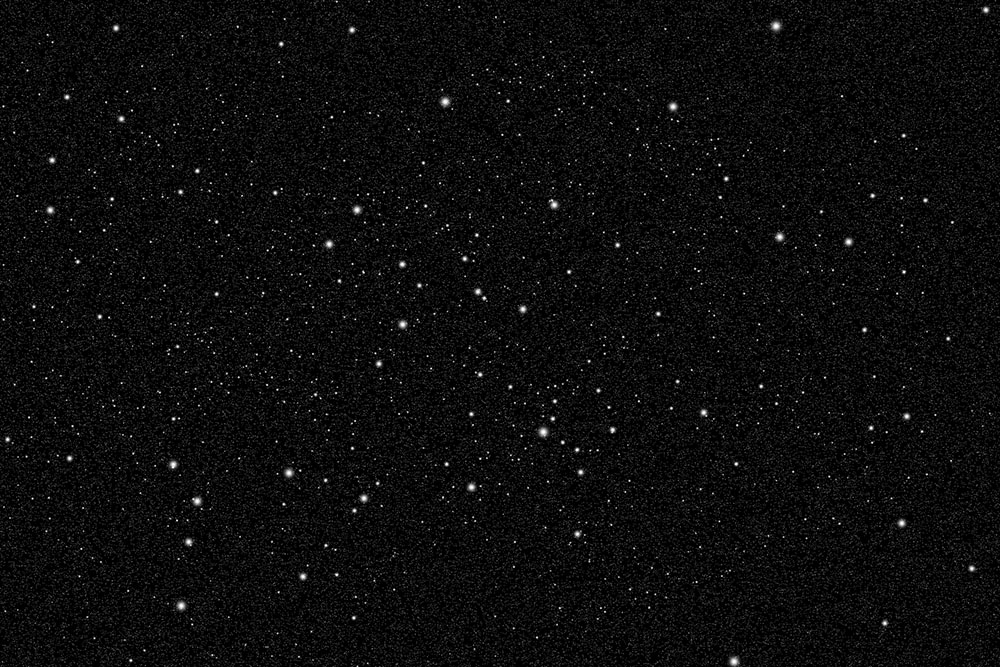
press Command+E to merge the layers
Filter > Blur > Gaussian Blur radius: ~0.5
repeat this step one more time, and set the blending mode to "Screen"
press Command+T and hold down Shift and Option to increase the size of this layer 2x to vary the size of your stars
with this same layer selected, go to Image > Adjustments > Brightness/Contrast
Brightness: -44, Contrast: 100 (or to your liking)
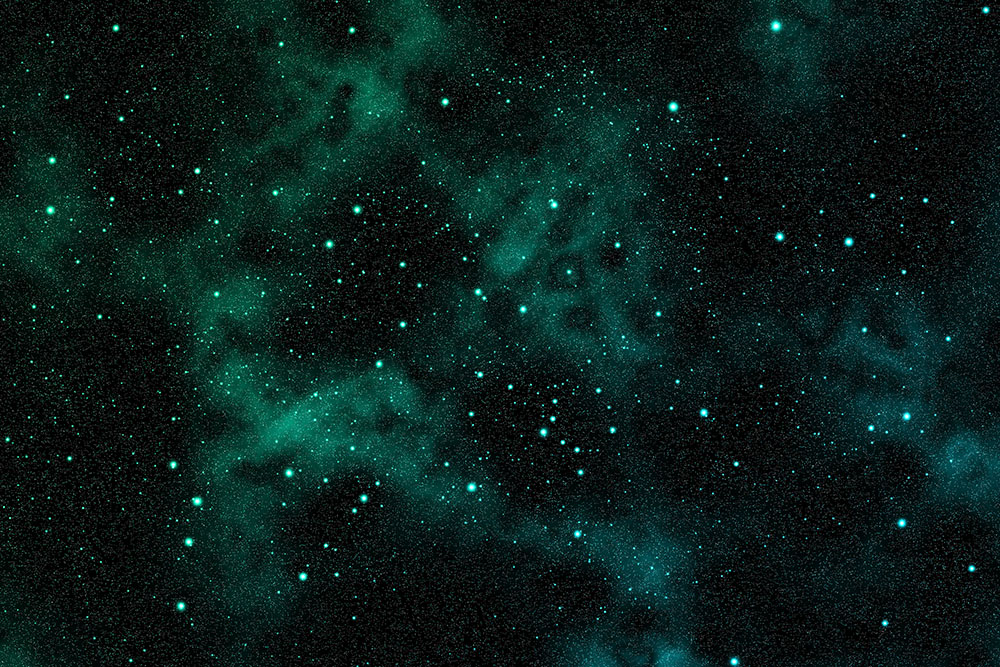
select all of your black star layers and put into a group, label this group "Background Stars"
OR you are feeling very bold today, select them and press Command + E to merge them all together
lock this group or layer by clicking on it in the layers panel and then clicking the (lock) symbol
Step 3: make a new layer
go to your brushes and select the “Soft Round Pressure Size” brush at 25px
open your brushes palette
in Brush Tip Shape, set spacing all the way up to 1000%
check “Shape Dynamics” and set the “Size Jitter” to 100%
check “Scattering” and click on it to access the options, set “Scatter” to 1000%, and check the “Both axes” box
if you want, you can save this brush for future use by pressing the new brush icon in the bottom right corner
close out of the dialogue, make sure white is your foreground color and play around with the brush. It should be depositing stars everywhere.
make your brush smaller and make more stars for variation
Step 4: make a new layer, fill it with white
erase it with a very large soft edged scatter eraser (scroll down to the end of your brush list to select your scatter brush)
set the opacity to 25%
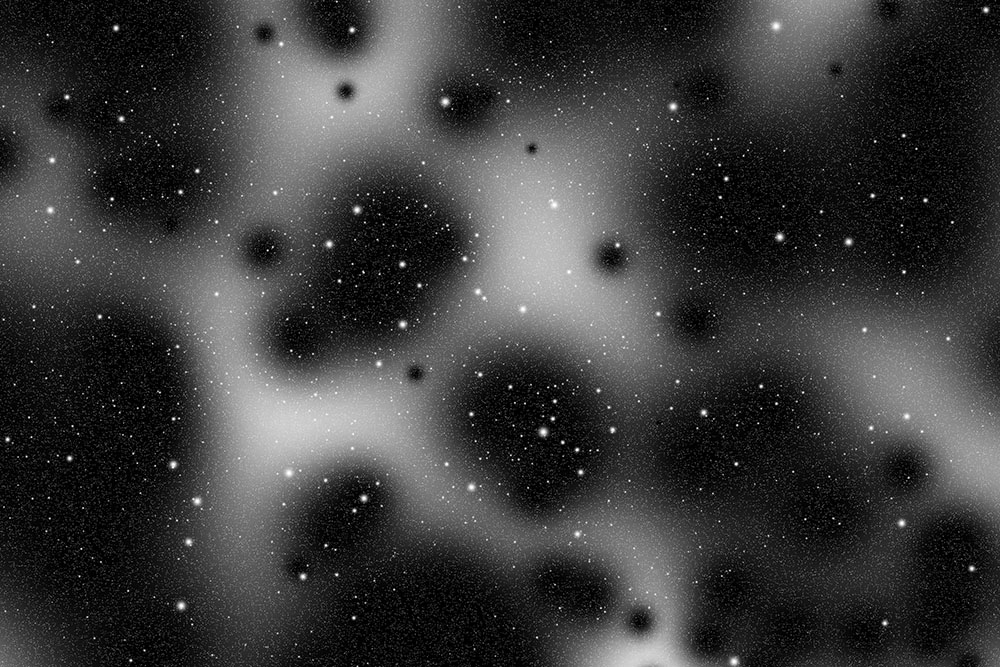
Step 5: make a new layer
make sure your foreground and background colors are black and white
go to Filter > Render > Clouds
then go to Filter > Render > Difference Clouds
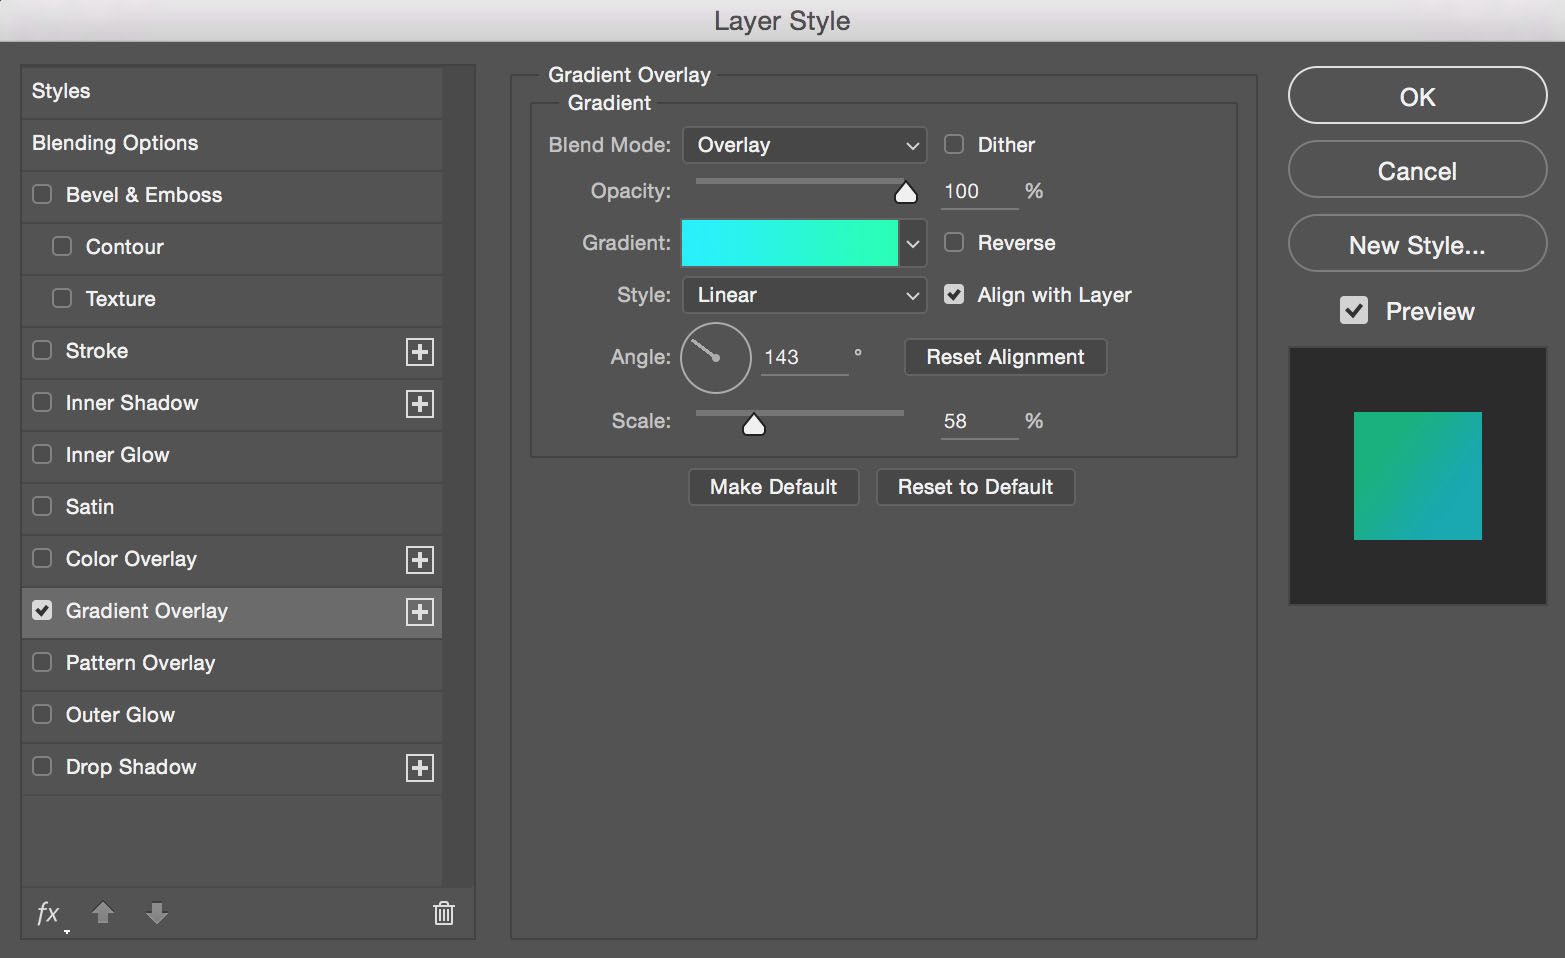
double click on the layer to bring up the Layer Style palette
add a gradient overlay to these specifications
Step 6: set the opacity to 76%
and the blending mode to "Overlay"
Step 7: make a new layer
Filter > Render > Clouds
then make another new layer, Filter > Render > Clouds and then Filter > Render > Difference Clouds
make a new layer and fill it with a nice deep blue
erase into this layer with the soft round scatter eraser
set the Opacity to 40%, and the blending mode to "Screen"
Step 8: make a new layer
Fill it with a nice bright green
erase into it with a soft-edged scatter brush eraser
make a new layer and fill it with a nice deep blue
set the Opacity to 20%, and the blending mode to "Screen"
Step 9: click on the adjustment layer symbol (looks like a black and white cookie)
select "Color Balance"
play around with these settings to get the color the way you like it
here I've boosted cyan, magenta, and blue in the midtones
I've also moved my stars layer up above the nebula layers so that it is no longer affected by the color gradient, and they are white again
Step 10: make a new layer
use a large black soft edged brush to block out some of your color and make your space darker, set the Opacity to 60%
move the "stars" layer to the top, and make another new layer on top of this
go in with your black soft edged brush and block out some of the stars
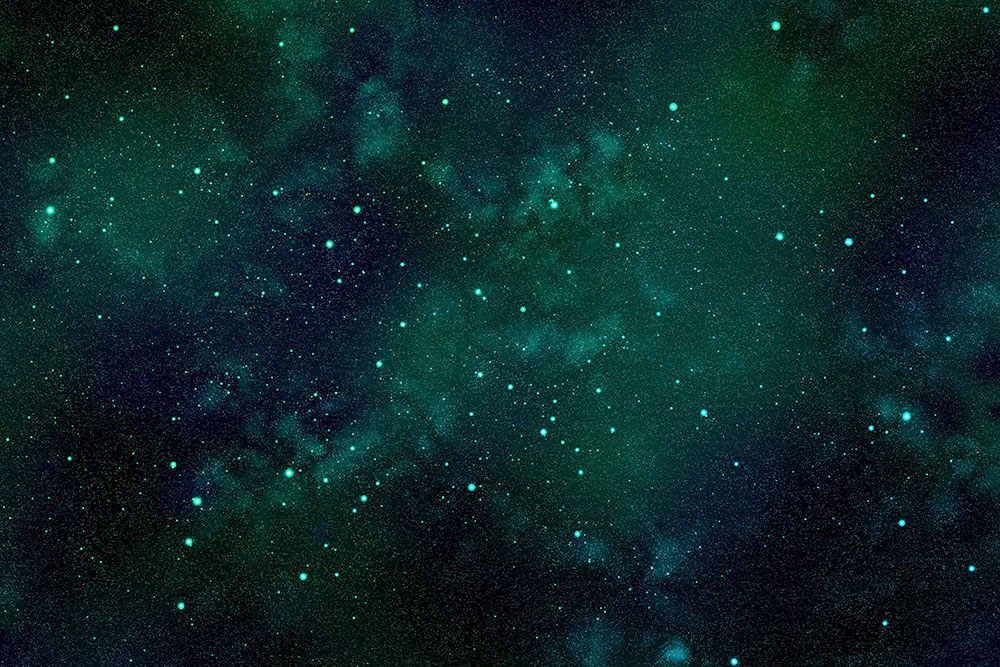
select all of these nebula layers, and click on the folder icon to put them in a folder, label it "nebula"
INTERMISSION
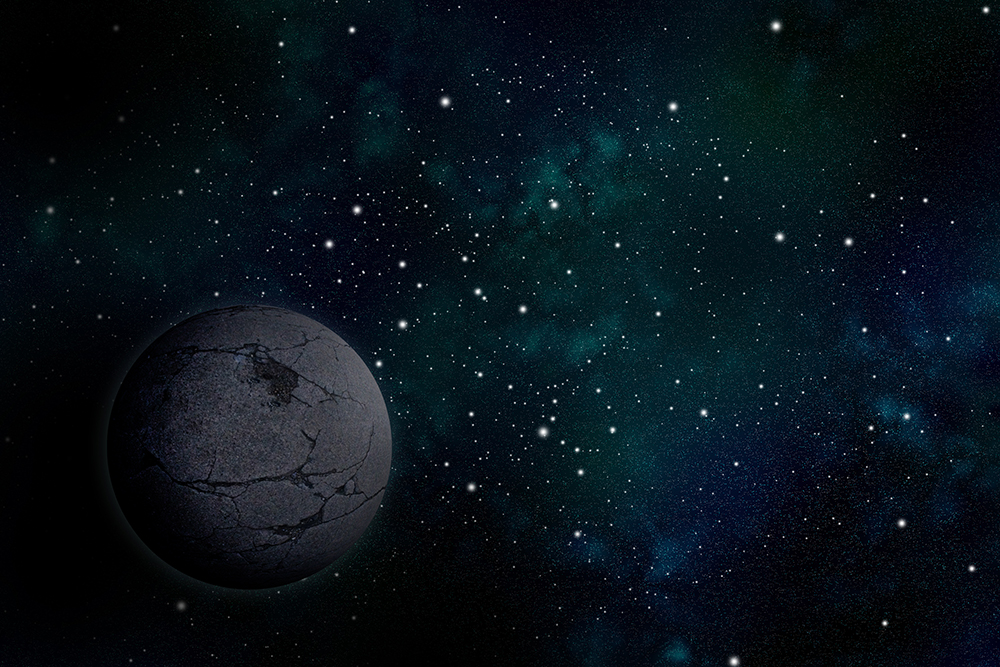
Step 11: choose one of these textures. We are going to make a planet.
drag the image directly into Photoshop or Control + click and select "Open Image in New Tab" and drag into Photoshop
you may also choose your own texture, and feel free to get creative, just make sure you start with a high resolution image
Lost and Taken has some really great textures to choose from

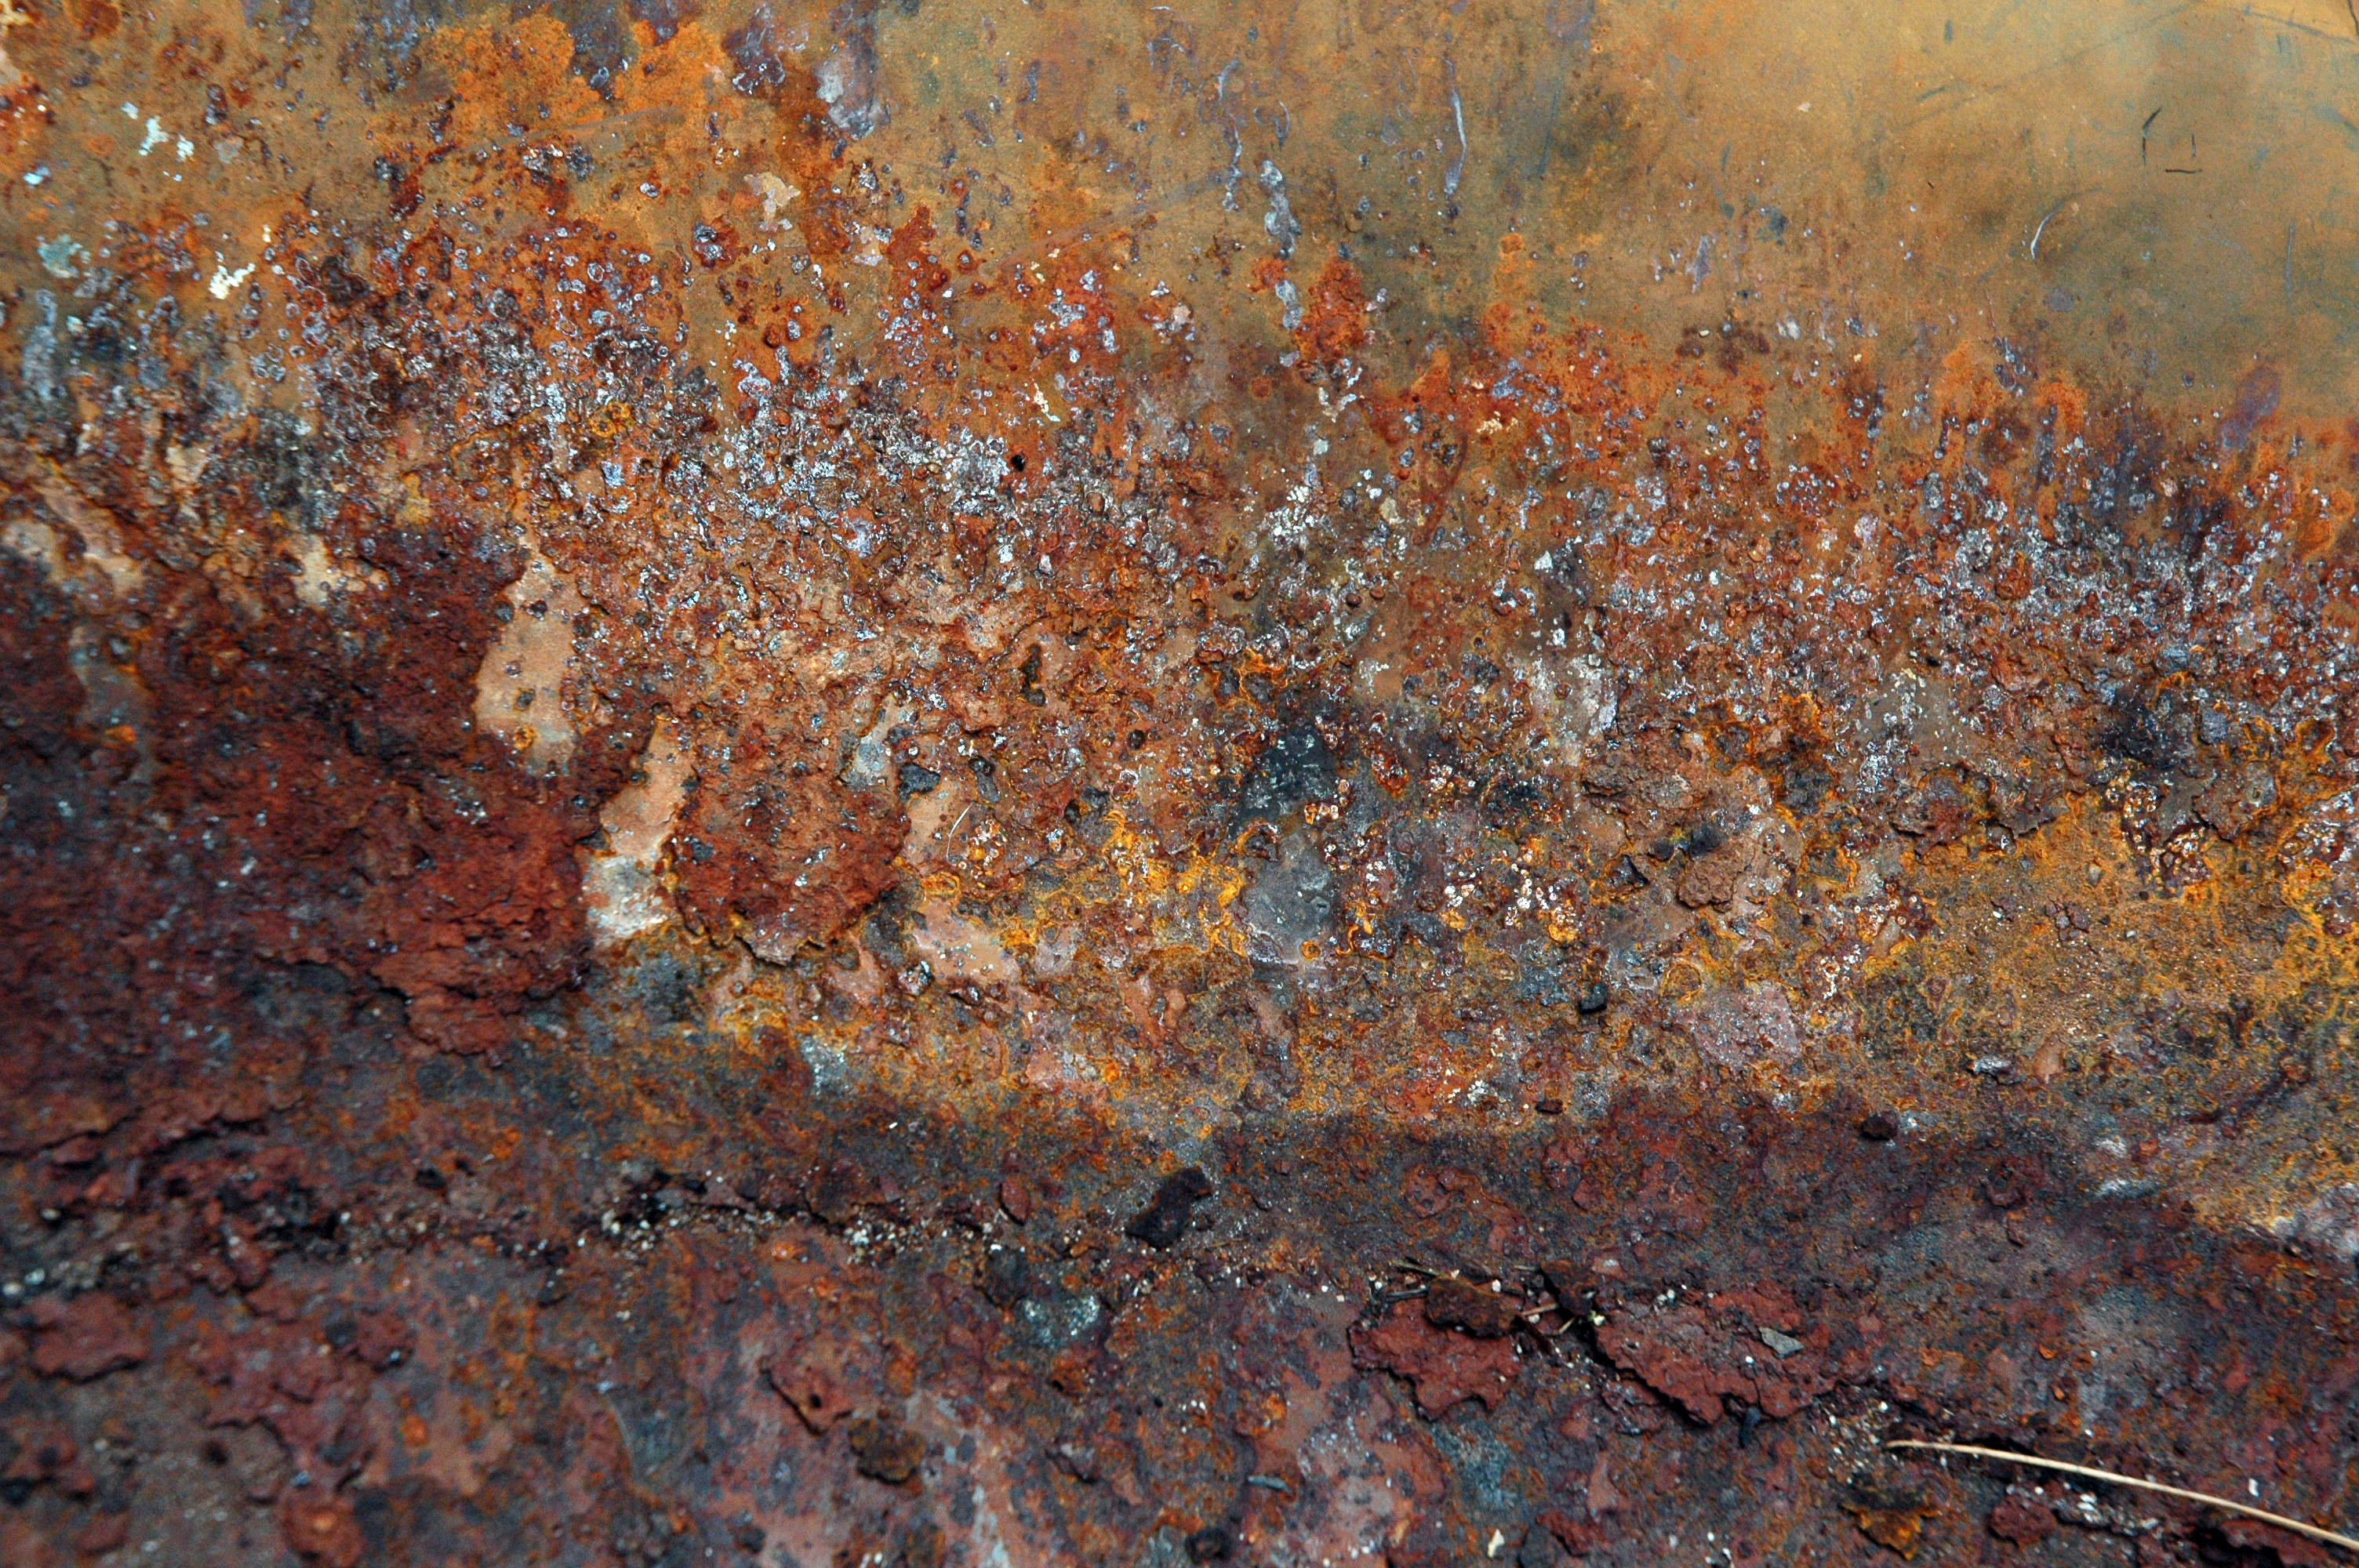
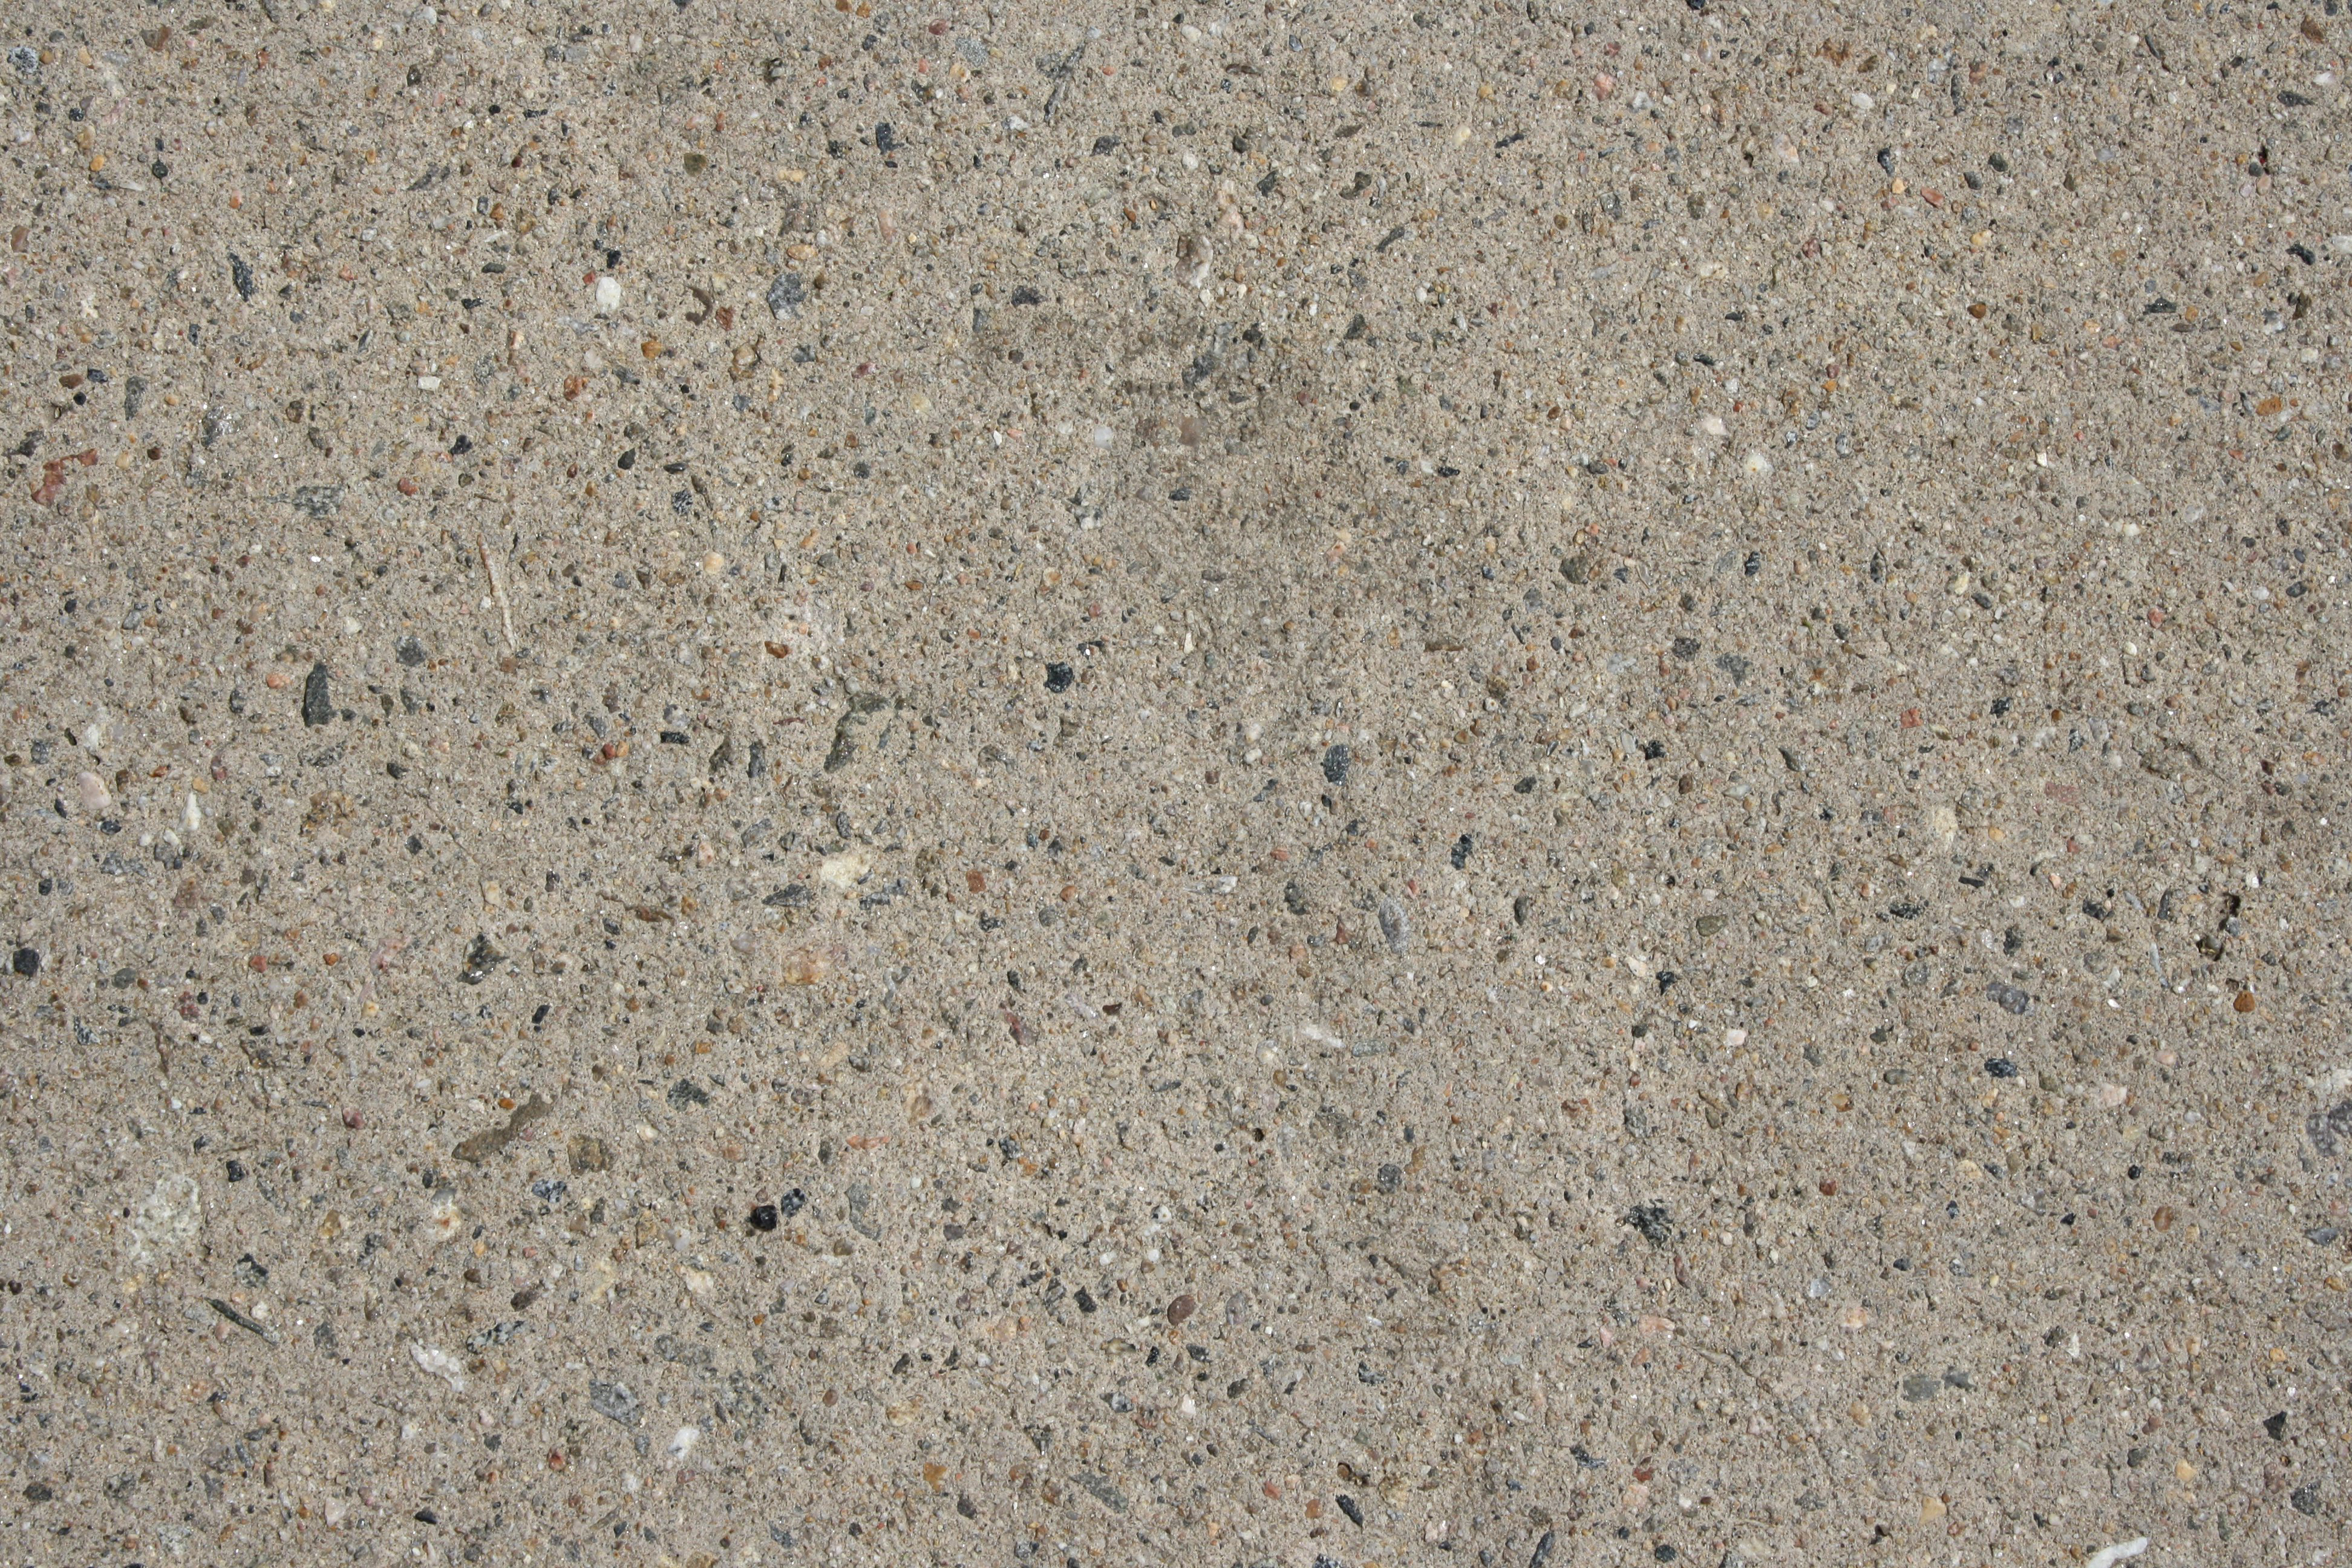
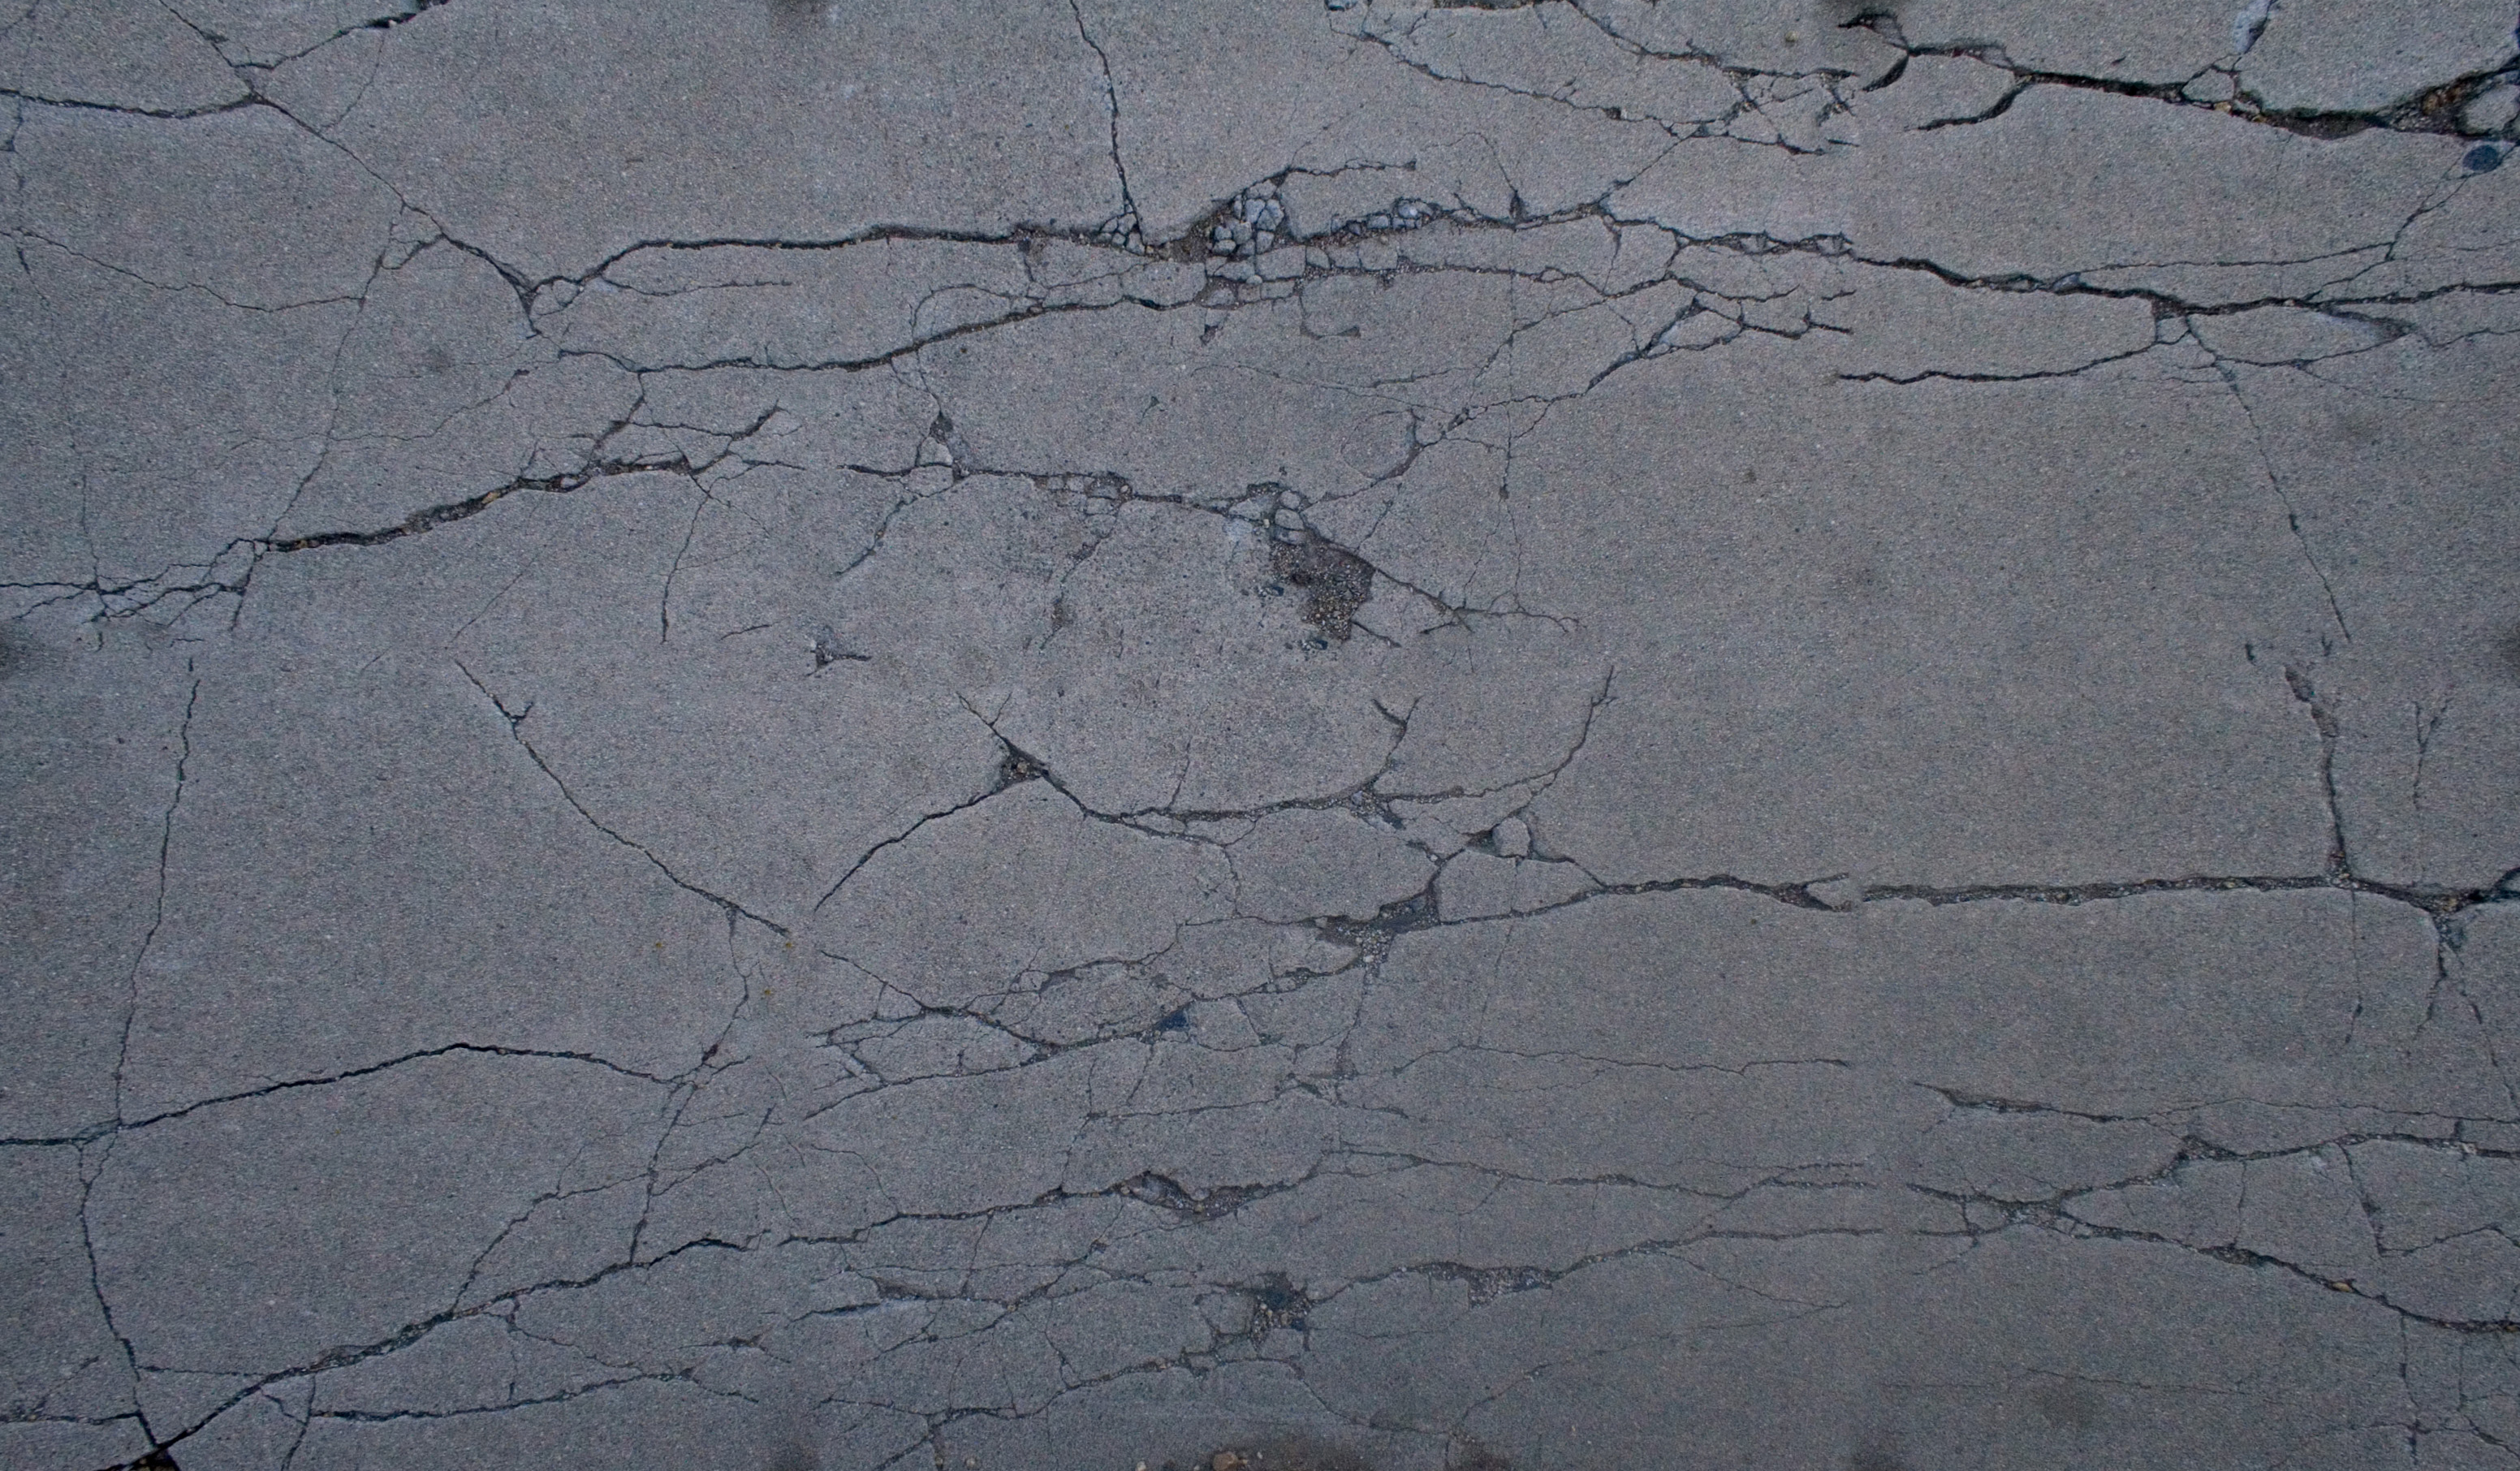
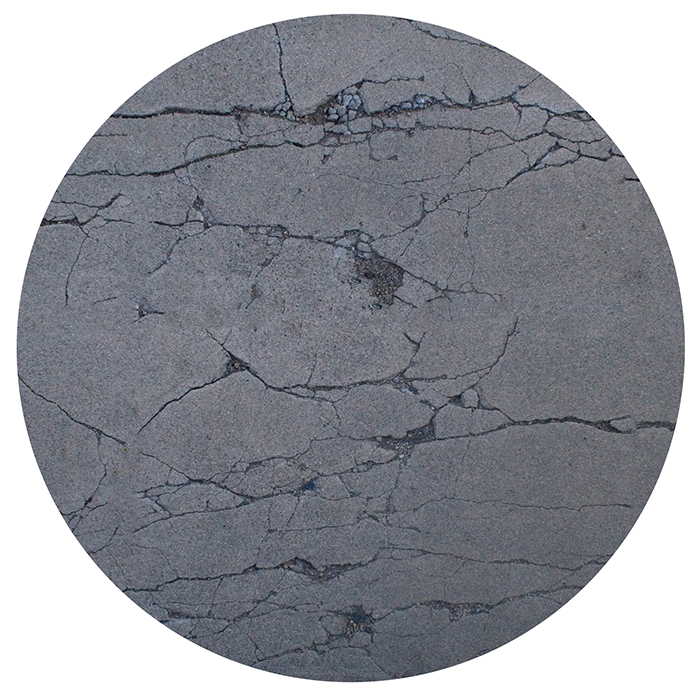
Step 12: crop your image to a square
double-click your Background layer to unlock it
with the elliptical marquee tool, click as close to the center of the image as you can and hold down Shift + Option to drag the circle out almost to the edge of the square
click Command + Shift + I to select the inverse
press delete to delete everything outside of the circle
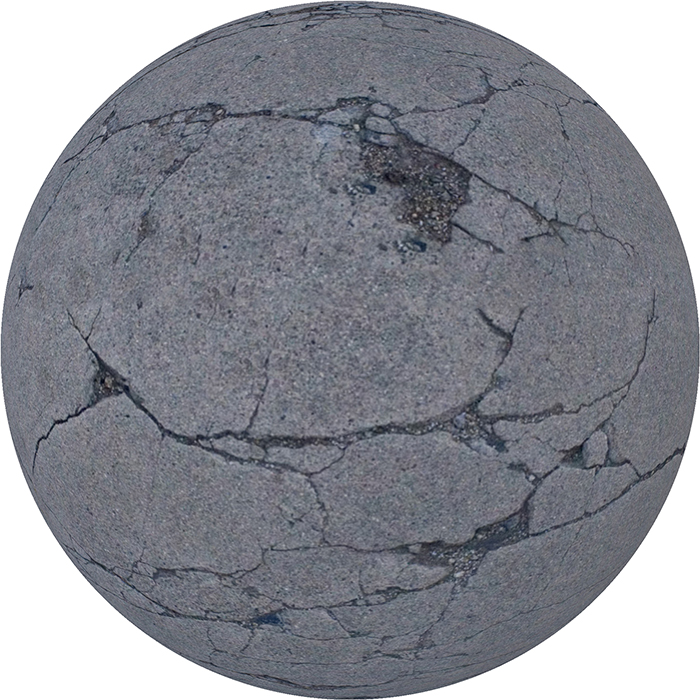
Step 13: press Command + D to deselect
go to Filter > Distort > Spherize
you may have to do this 2-3 times to get it the way you want
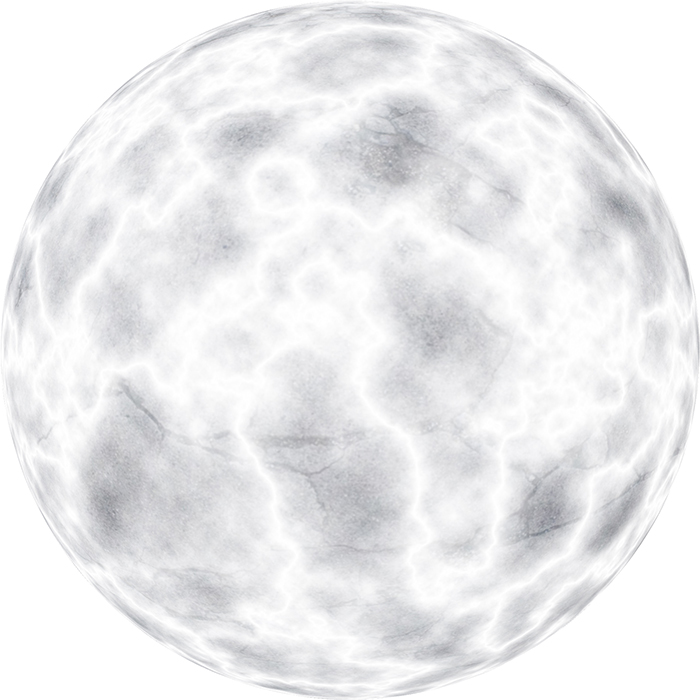
Step 14: make a new layer
go to Filter > Render > Clouds
go to Filter > Render > Difference Clouds
press Command + I to invert the layer
go to Filter > Distort > Spherize (you may need to do this twice)
hold down the option key and hover your cursor between the two layers
click to link the top layer to the lower layer (this step can be a little tricky, but this is probably my favorite Photoshop trick)
set the cloud layer to "Screen" and drag both of these layers into your original Photoshop file
Step 15: double-click the planet layer to bring up layer styles
click on "Outer Glow" and add a blue outer glow at 8% Opacity, and set the blending mode to "Screen"
Step 16: hide your cloud layer and duplicate your planet layer
set the new layer to "Multiply" and use the burn tool to create a shadow
link this layer to the original planet layer (directly below) by holding down Option and clicking between the layers
it doesn't matter for this layer, but we will link most of the other planet layers above it
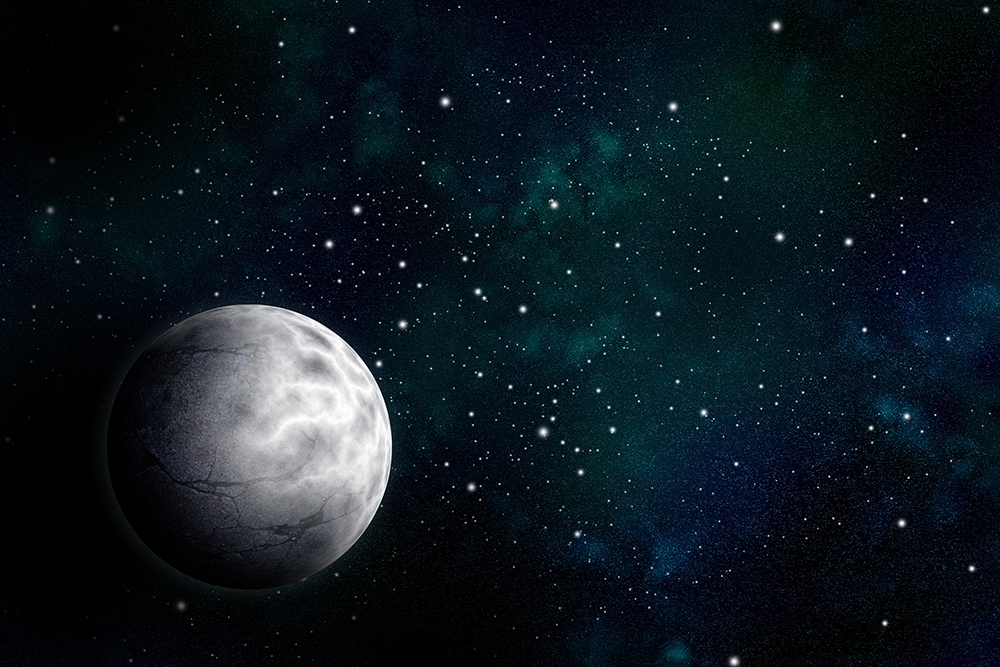
Step 17: turn the cloud layer back on, and mask out the shaded side of the planet
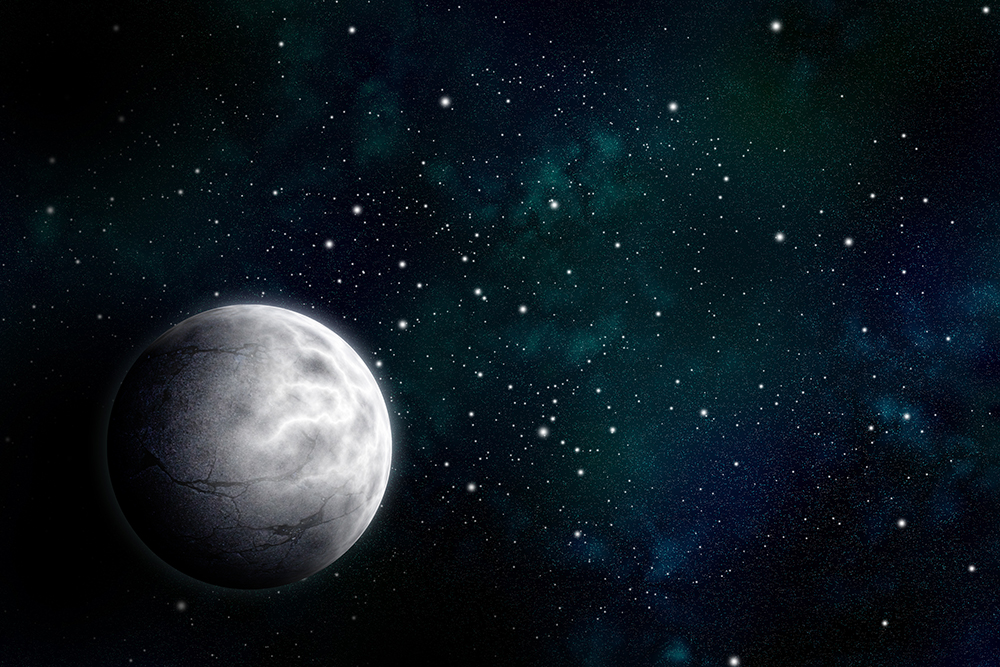
Step 18: copy the planet layer again
using a large hard-edged eraser, erase all but a small sliver of the planet
go to Filter > Blur > Gaussian Blur
repeat this step a few more times until you have the glow you want
these layers will not be linked to the planet layer, so move them to the very top of the layer hierarchy
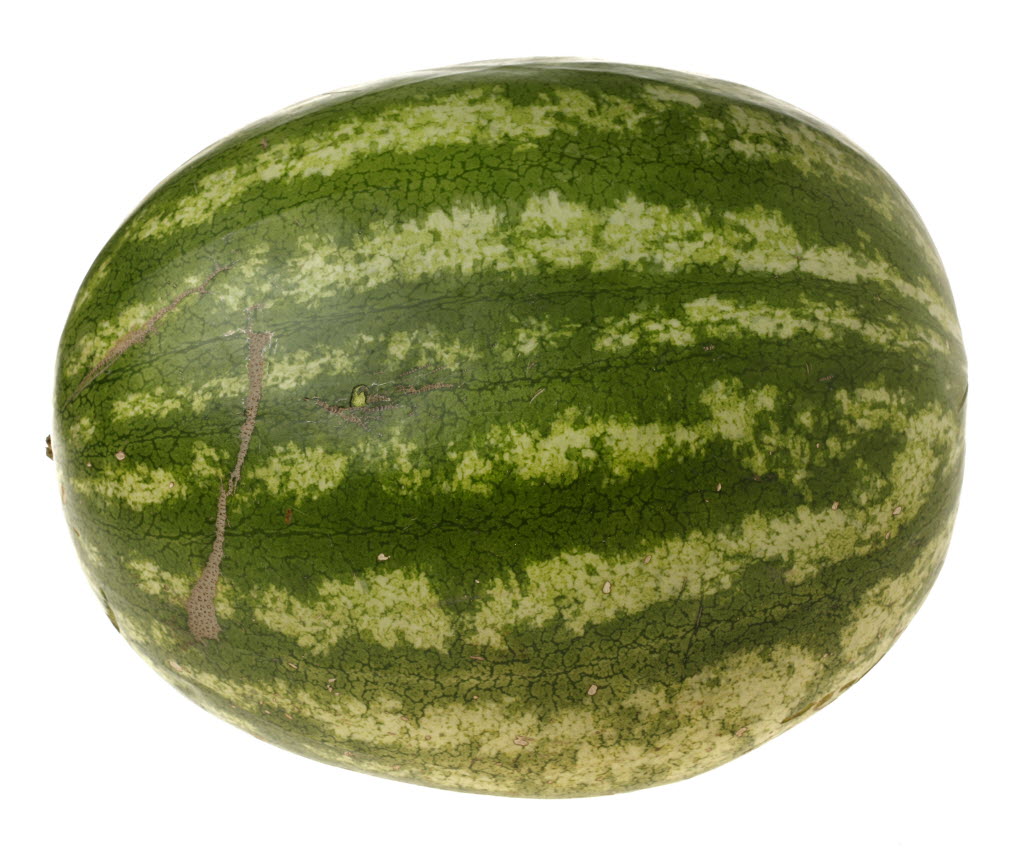
Step 19: I think this planet needs more/different texture and I've always thought watermelons look spacey so lets add a watermelon texture
drag this image into your photoshop file, and place it directly above your clouds layer
set the blending mode to "Overlay"
layer textures to get create your own unique planet
Step 20: make a new layer (also linked to the planet and above everything else)
set this layer to "Overlay" (or even "Multiply" for a more subtle effect) and color away this is your chance to adjust the color of your planet
you may want to adjust your outer glow to match this layer by double-clicking the original planet to bring up the layer styles
Step 21: duplicate the "clouds" layer and bring it to the top of the rest of the layers
use the Smudge tool on the cloud layer to make them a bit more realistic
size: 10px, strength: 42%
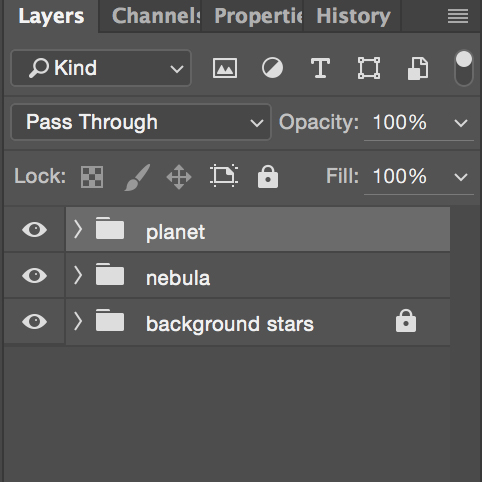
Step 22: I'm pretty happy with this planet so I am going to put all of these layers into a folder
don't worry about "Pass Through"
at this point I am going to temporarily hide my planet layer so I can focus on the star
INTERMISSION
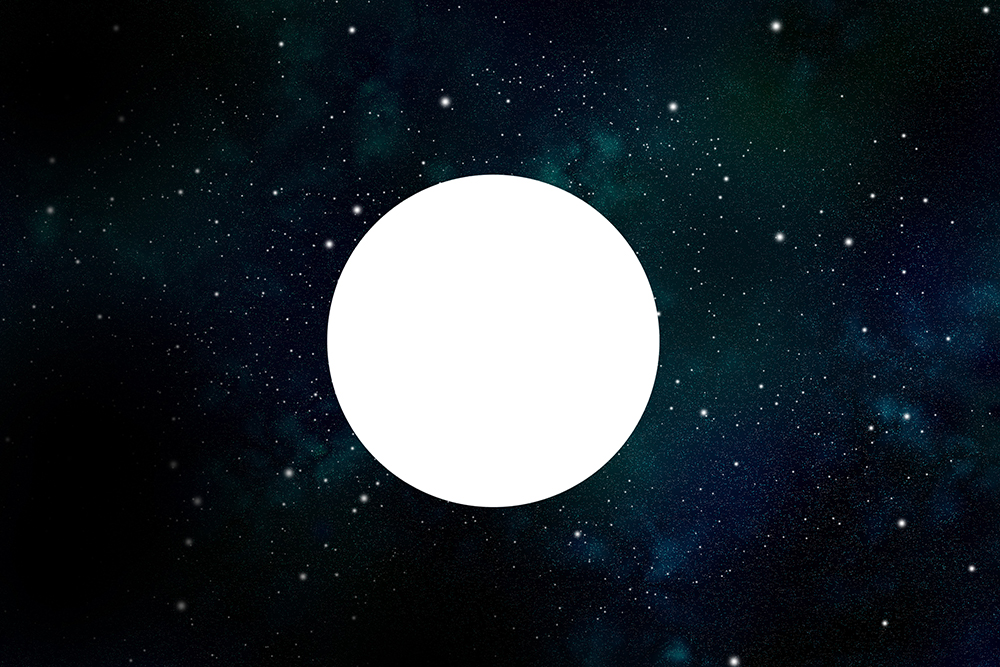
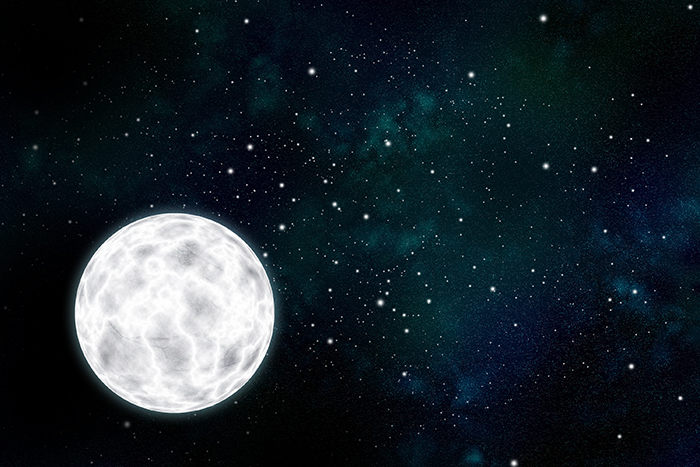
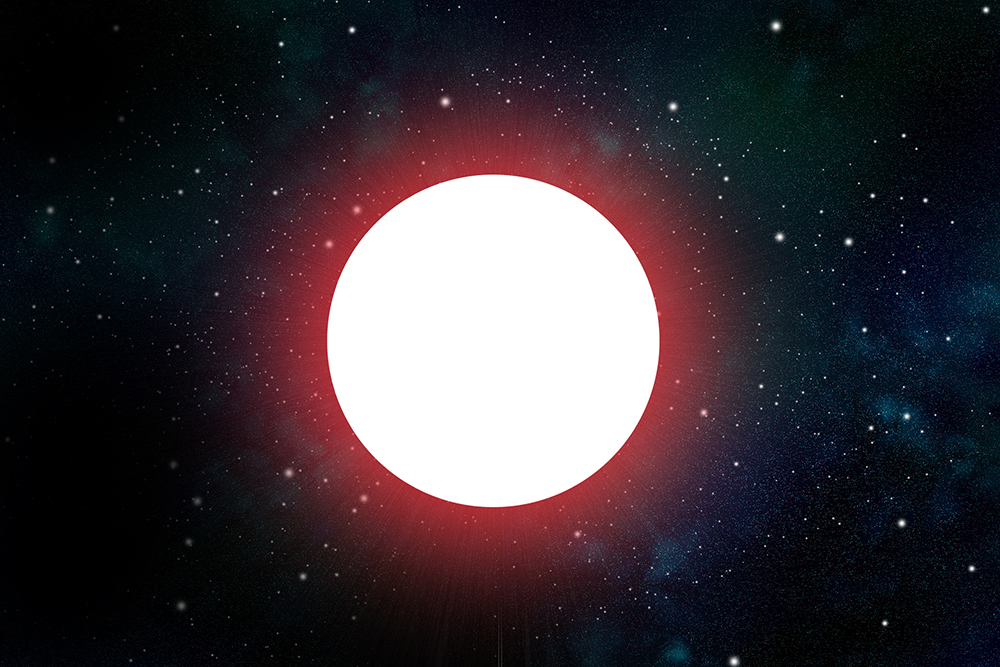
Step 23: Now let's get started on the star!
make a new layer
with a very large white hard edged brush, click once to make a circle as close to the center of your image as you can
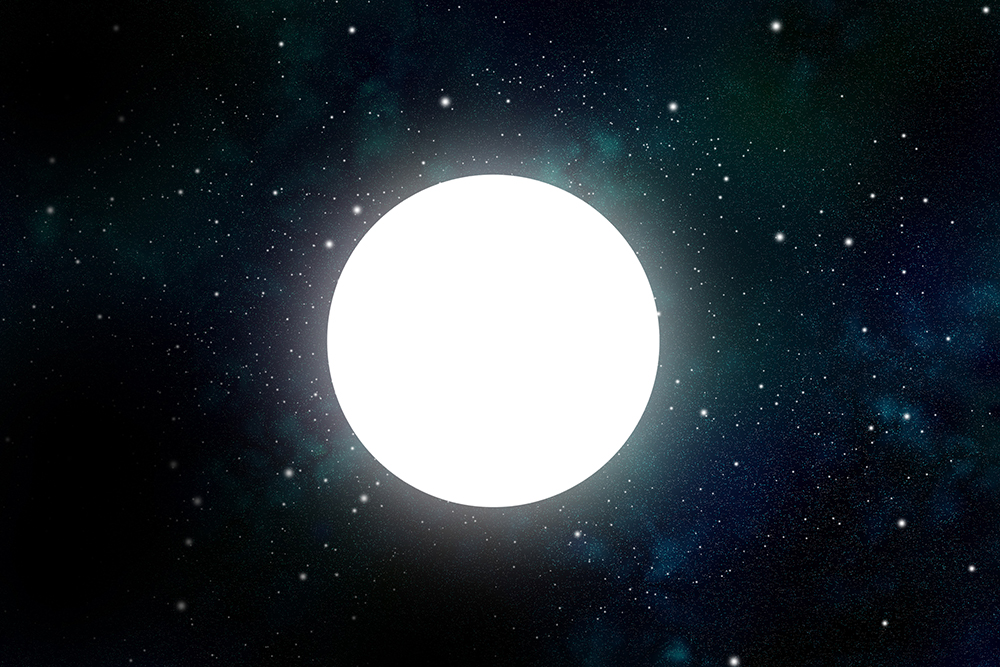
Step 24: duplicate your star layer
go to Filter > Blur > Gaussian Blur
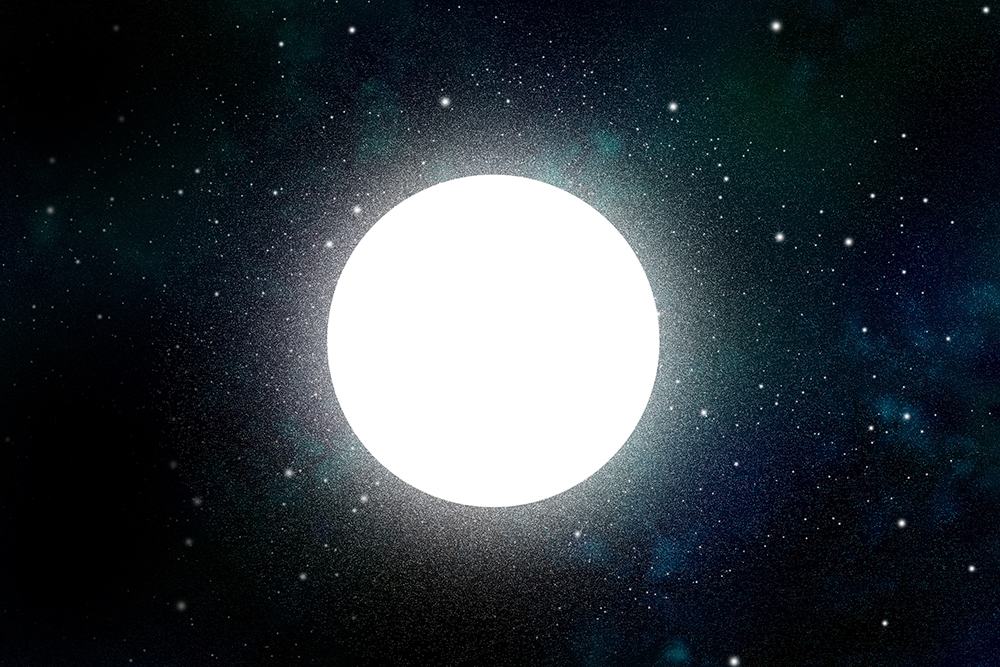
Step 25: make a new layer
switch to a soft edged brush that is the same size as your star
set the brush blending mode to "Dissolve" (this drop-down menu is directly to the right of your brush in the top bar)
click once
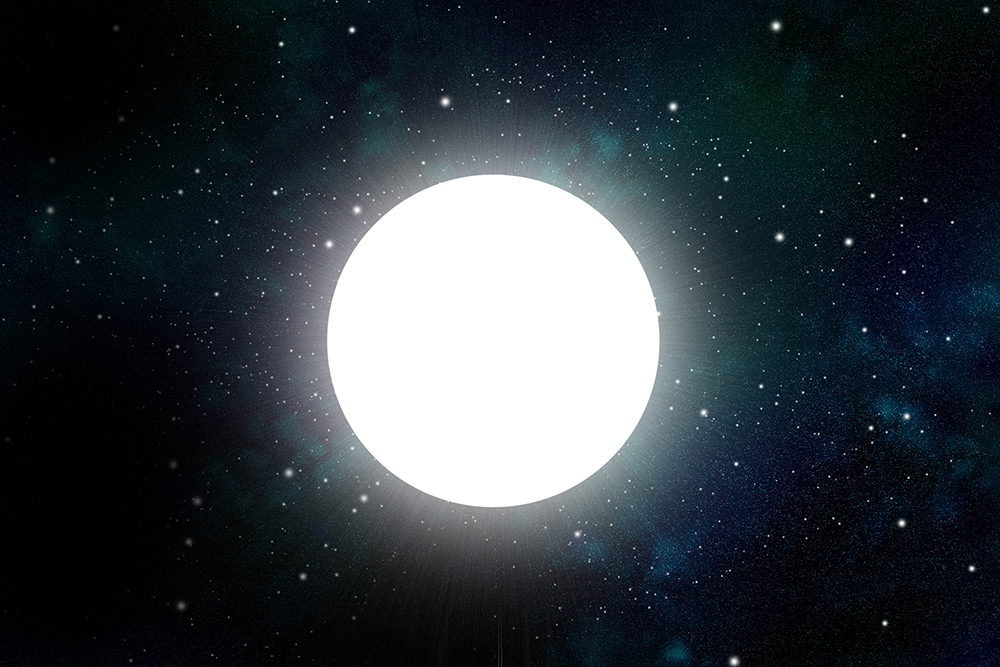
Step 26: go to Filter > Blur > Radial Blur
select "Zoom", "Best" and crank up the Amount to 100
Step 27: order your layers like this:
top layer: Star
new layer filled with bright red
Middle: Gaussian Blur
lowest: Radial Blur
link the red layer to the Gaussian Blur layer by holding down Option
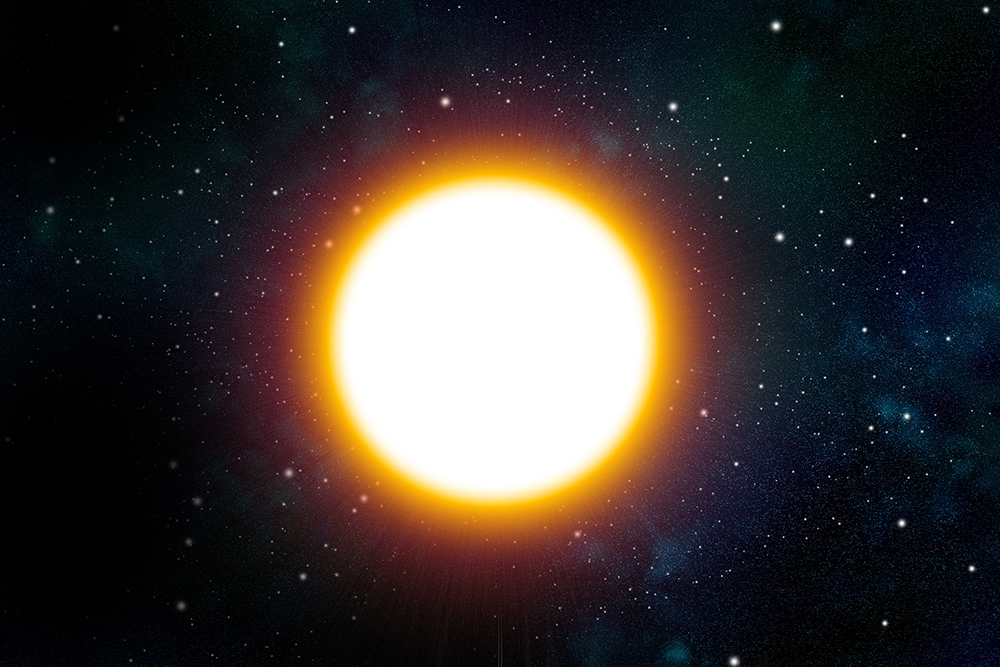
Step 28: on your "star layer" (with the hard edge) double click to bring up layer styles
add an orange/tangerine Outer Glow at 100% Opacity and a size of 180px
add an inner glow in the same color also at 100% Opacity and a size of 70px
Middle: Gaussian Blur
lowest: Radial Blur
link the red layer to the Gaussian Blur layer by holding down Option
Step 29: make a new layer
make sure black and white are your foreground and background colors
Filter > Render > Clouds
Filter > Render > Difference Clouds
Filter > Distort > Spherize
Filter > Distort > Spherize (again)
now take this layer and squish it into a circle the same size and directly above your star layer
link it to the star layer by holding down Option
set the blending mode to "Multiply"
Step 30: add a Hue/Saturation adjustment layer
click "Colorize"
bump up the Saturation to 100, and Lightness to +50
move the "Hue" slider around until it is the color you want
select the clouds layer and the Hue/Saturation layer and press Command + E to merge
copy this layer and set it to "Overlay"
repeat the steps above to change the Hue/Saturation and merge
rotate it by 90 degrees for variation in your star texture
make sure this layer is linked to the ones below it

Step 31: make a new layer and set it to "Screen"
paint a lot of white into this layer to make your star glow
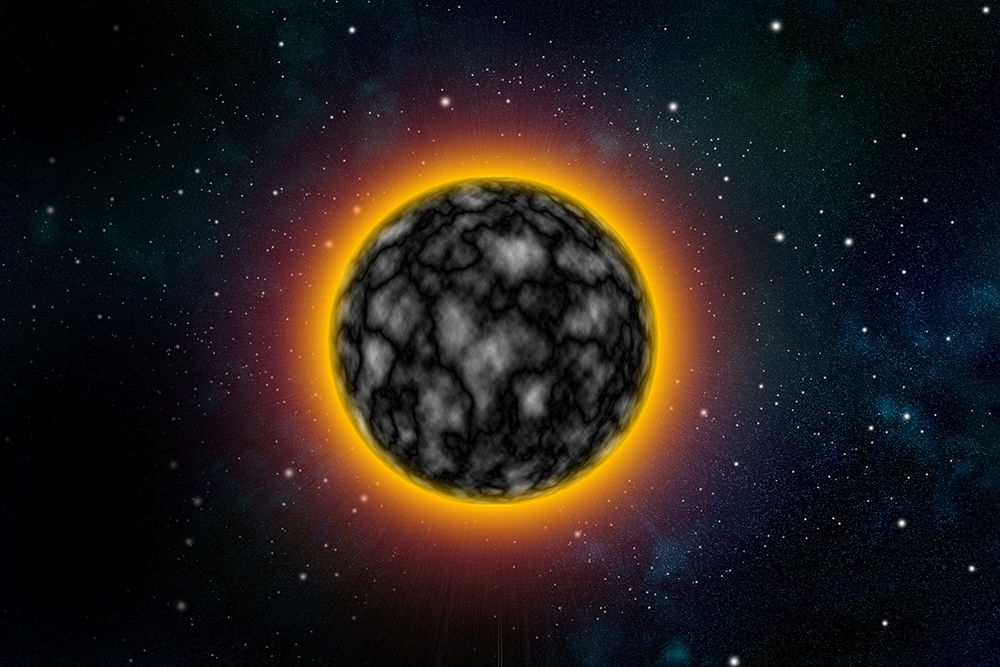
Step 32: turn your planet back on and work with the composition
INTERMISSION
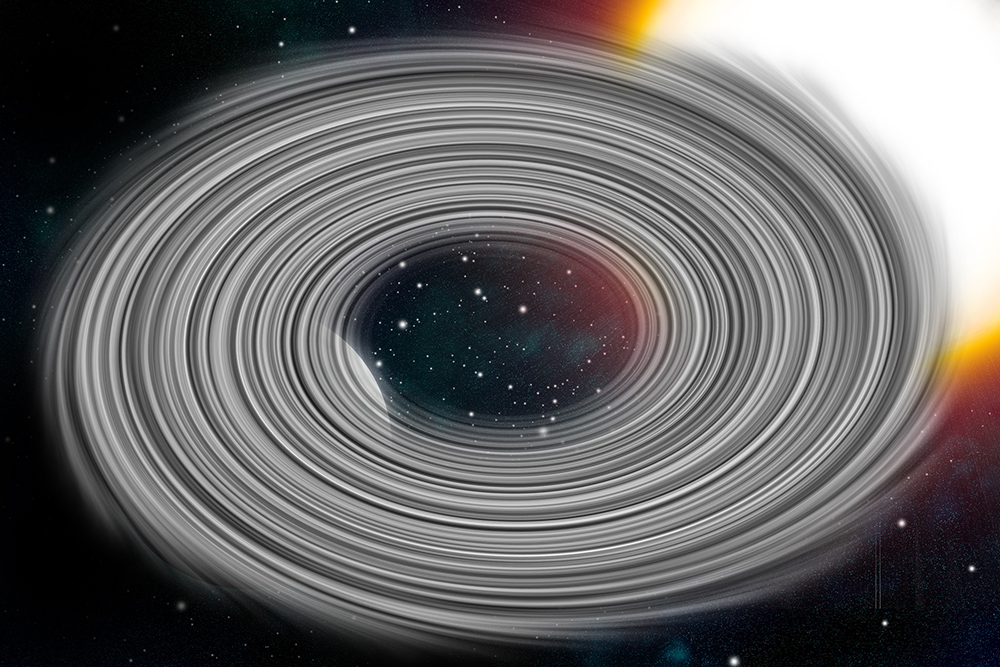
Step 33: make sure black and white are your foreground/background colors
Filter > Render > Clouds
Filter > Distort > Twirl and set the angle all the way to 999
repeat the Twirl
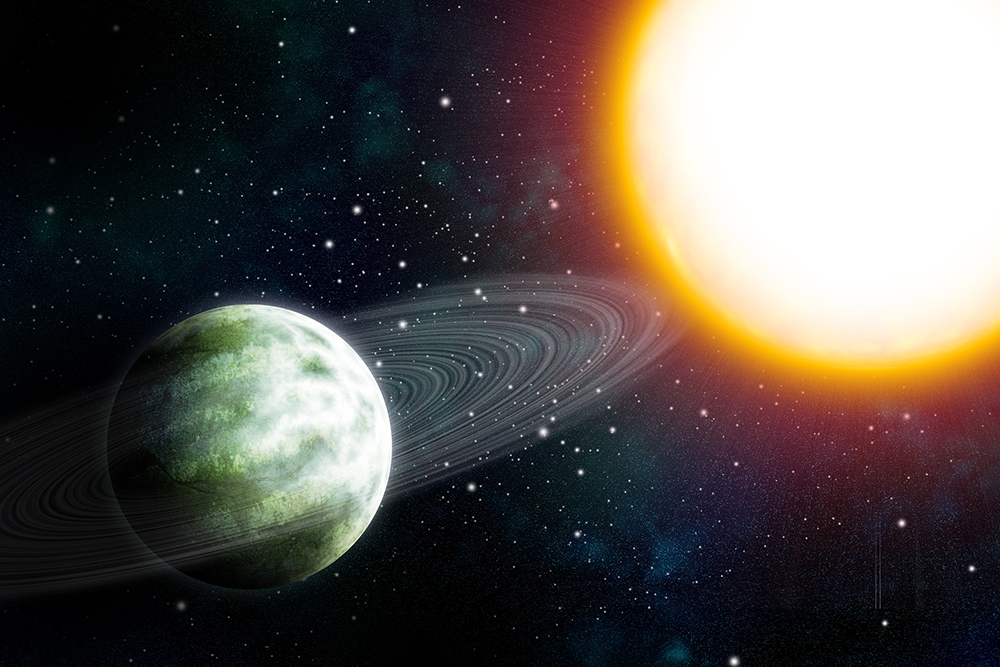
Step 34: set the blending mode to "Screen" and squish the twirl so it looks like a ring
mask out the part that goes behind the planet
bring down the Opacity and Fill for more subtle rings
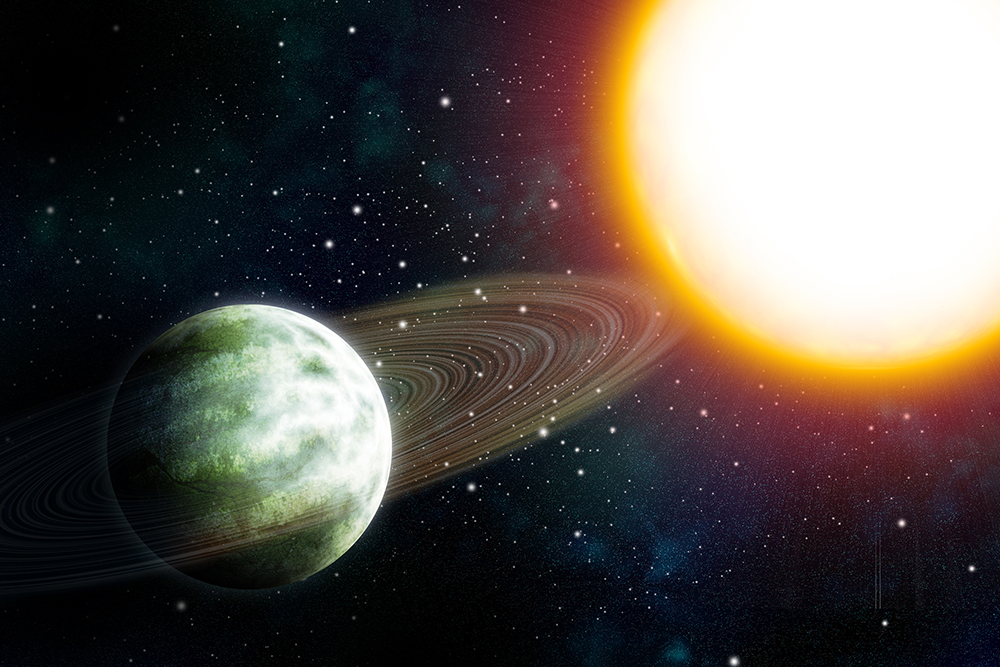
Step 35: make a new layer and link it to the rings layer
set this layer to overlay and use it to color your rings
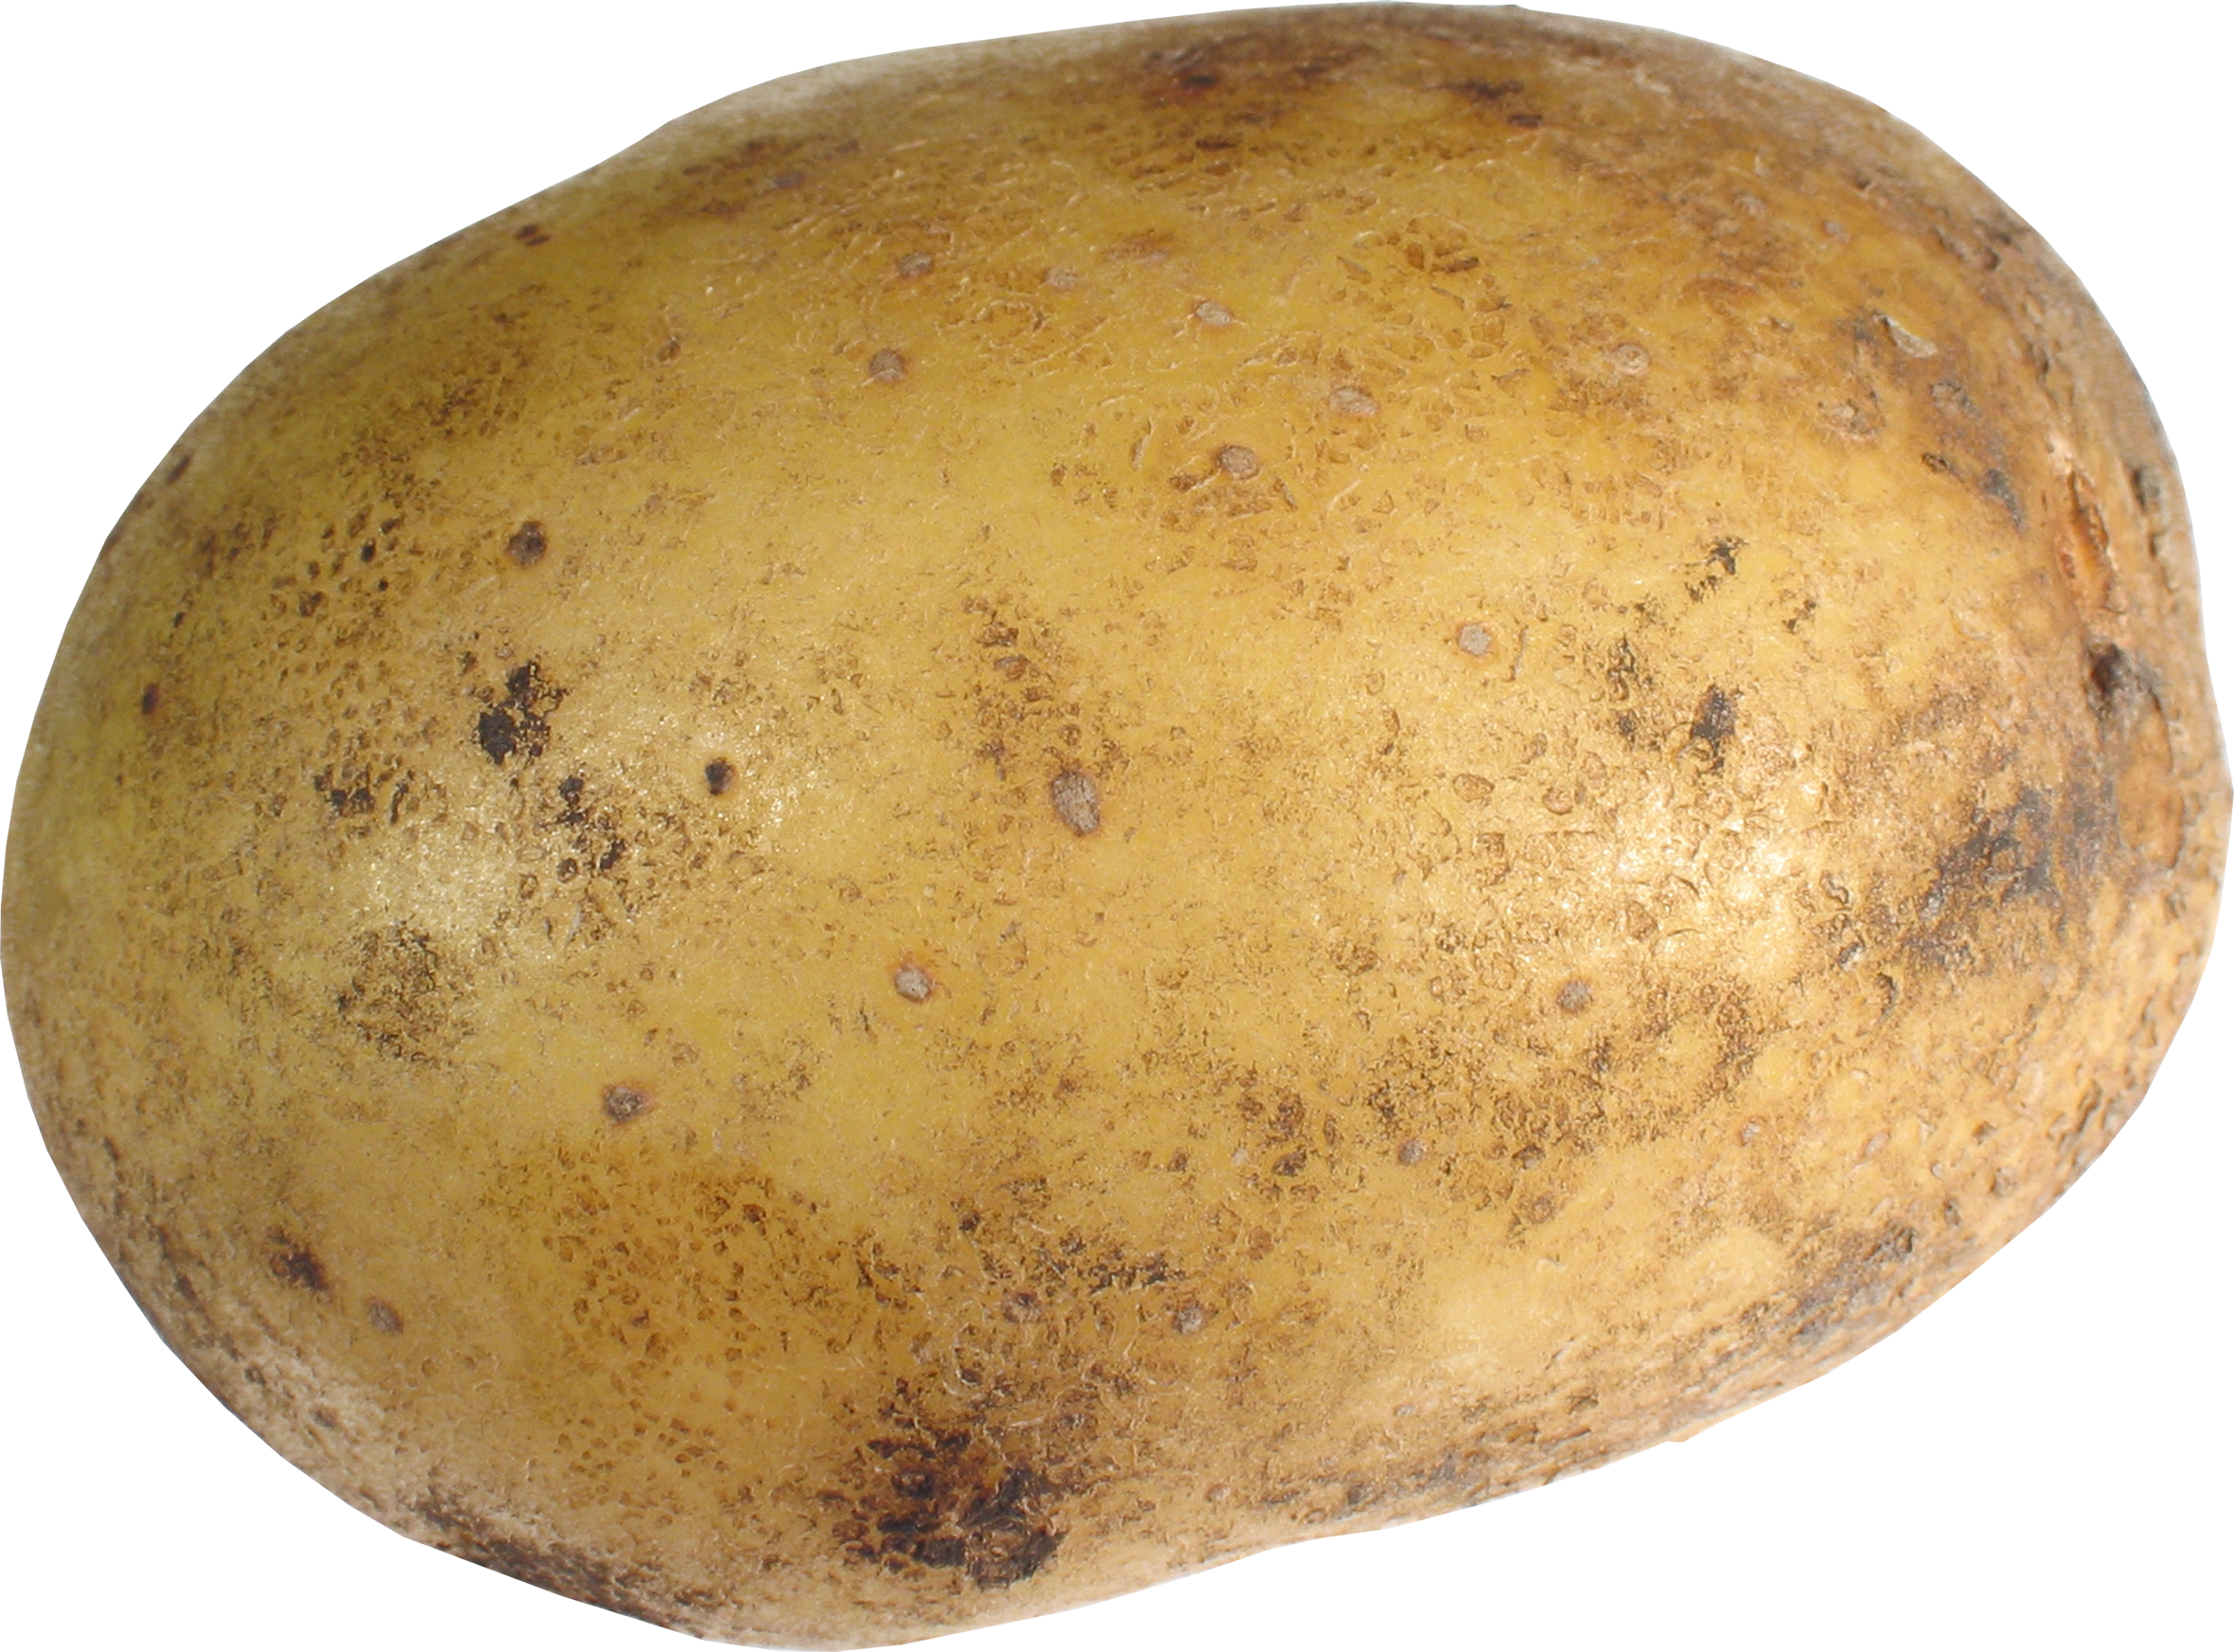
Step 36: download this image of a potato and drag it into your composition
add a subtle outer glow, and use Hue/Saturation to color it to your liking
don't forget to add a shadow

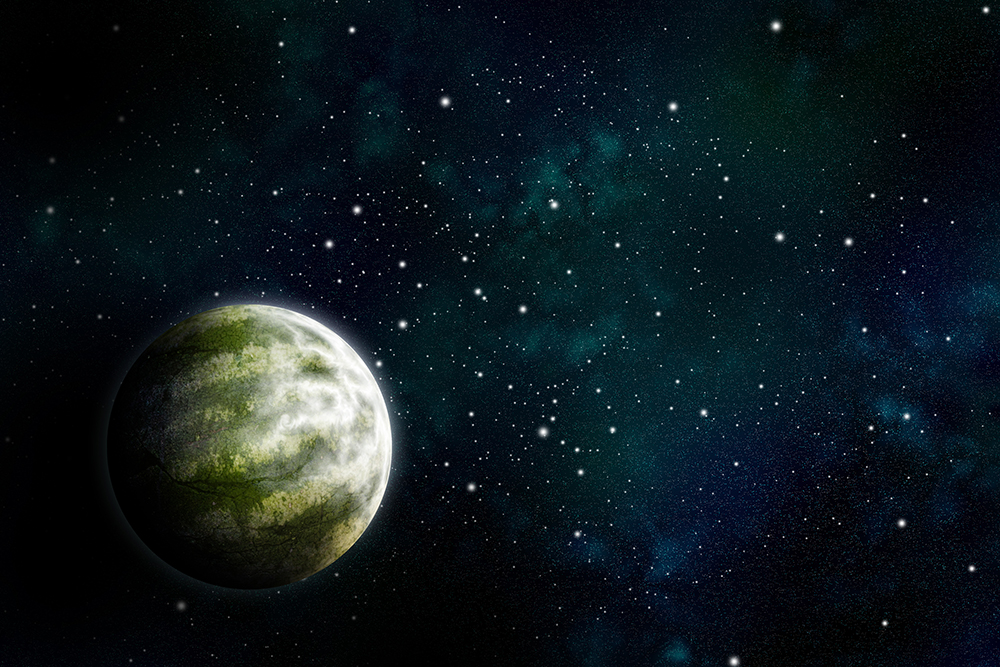
The Final Product!
The Final and Most Important Step
Name your planet!
Then email a jpeg to me! I would love to see what you made!
lucy@lucyconklin.com